Accessory dwelling unit floor plans are the single most consequential design decision you will make in your entire ADU project. The layout you choose determines your construction budget, your rental income potential, your permit timeline, and how comfortable your unit will be to live in for decades. This complete guide covers every ADU floor plan type, size, design element, and pitfall — so you can choose and build with total confidence. For a deeper walkthrough, see our Complete ADU Guide 2025.
According to Wikipedia’s overview of accessory dwelling units, ADUs have become one of the fastest-growing housing types in North America — largely because they allow homeowners to add fully livable space without purchasing additional land. Understanding your floor plan options is now more valuable than ever, whether you are building for rental income, multigenerational living, a home office, or long-term property investment.
What Are Accessory Dwelling Unit Floor Plans?
Accessory dwelling unit floor plans are scaled architectural drawings that show the interior layout of a secondary housing unit located on the same lot as a primary residence. These documents define every room, wall, door, window, utility placement, and mechanical space in the proposed structure. They are the foundational documents used by architects, general contractors, structural engineers, and local permit offices to plan, bid, and approve ADU construction.
A complete ADU plan set typically includes a site plan showing the unit’s position on the lot, a floor plan showing the interior layout, exterior elevations showing all four sides of the building, cross-sections showing structural details, and — in many jurisdictions — energy compliance documentation such as a Title 24 report in California or equivalent energy code documentation in other states.
Choosing the right accessory dwelling unit floor plan early in the process saves money, accelerates permits, and dramatically reduces the chance of costly redesigns mid-construction.
For a deeper walkthrough, see our Accessory Dwelling Unit Cost Estimate: 2026 Pricing Guide.
The 4 Main Types of ADU Floor Plans
Every ADU floor plan falls into one of four primary categories. Each category suits a different property type, budget, and living goal. Understanding the differences before you browse specific layouts will save you significant time and help you focus on plans that are actually buildable on your lot.
1. Detached ADU Floor Plans
Detached ADUs are fully independent structures built on the same lot as the primary home, sharing no walls with it. Because they are standalone buildings, detached ADU floor plans offer the greatest design flexibility — you can orient the structure, position the entrance, and configure the interior almost entirely based on your lot and preferences. Detached plans are ideal for maximizing rental privacy, accommodating guests or family members, or creating a truly separate living environment.
The trade-off is cost. Detached ADUs require their own foundation, roof system, exterior walls, utility connections, and mechanical systems from scratch. Expect construction costs ranging from $150 to $400+ per square foot depending on your region, finishes, and site conditions.
2. Attached ADU Floor Plans
Attached ADUs share at least one wall with the primary residence. These floor plans leverage the existing structure for cost savings — shared walls reduce framing, insulation, and exterior finish costs, and plumbing and electrical systems can often tie into nearby existing runs. See Attached ADU designs for smart plans, permit notes, and photo examples. Attached ADU floor plans are best suited for lots too small for a detached structure, or for homeowners who want to maximize usable yard space.
Acoustic separation between the main house and the ADU is a critical design consideration in attached floor plans. Proper insulation, resilient channel framing, and strategic door placement between units should be addressed in the plan itself — not treated as a construction afterthought.
3. Garage Conversion ADU Floor Plans
Garage conversion ADU floor plans repurpose an existing garage or carport into a fully livable dwelling unit. Because the structure already exists, these conversions typically carry a lower construction budget than new builds — most homeowners spend between $60,000 and $150,000 for a garage conversion depending on size and scope.
The challenge with garage conversion floor plans is working within a fixed footprint. Ceiling height is often the most critical constraint — building codes generally require a minimum finished ceiling height of 7 feet for habitable spaces, and older garages frequently fall short of this. The floor plan must also carve out space for insulation upgrades, a full bathroom, kitchen or kitchenette, heating and cooling, and egress windows — all within what was originally a utilitarian slab-and-stud box. Creative space planning and multi-purpose layouts are essential.
4. Junior ADU (JADU) Floor Plans
Junior ADUs, commonly called JADUs, are contained entirely within the walls of the existing primary home — usually a converted bedroom, interior garage section, or basement space under 500 square feet. JADU floor plans must include a private entrance, a dedicated cooking area (which can be an efficiency kitchenette rather than a full kitchen), and a living/sleeping area.
JADUs are the most affordable ADU option by a significant margin. However, they are governed by specific state laws (California’s JADU legislation under SB 13 is the most prominent), and some jurisdictions require the owner to occupy either the main home or the JADU. The floor plan must clearly document compliance with these occupancy and habitability requirements.
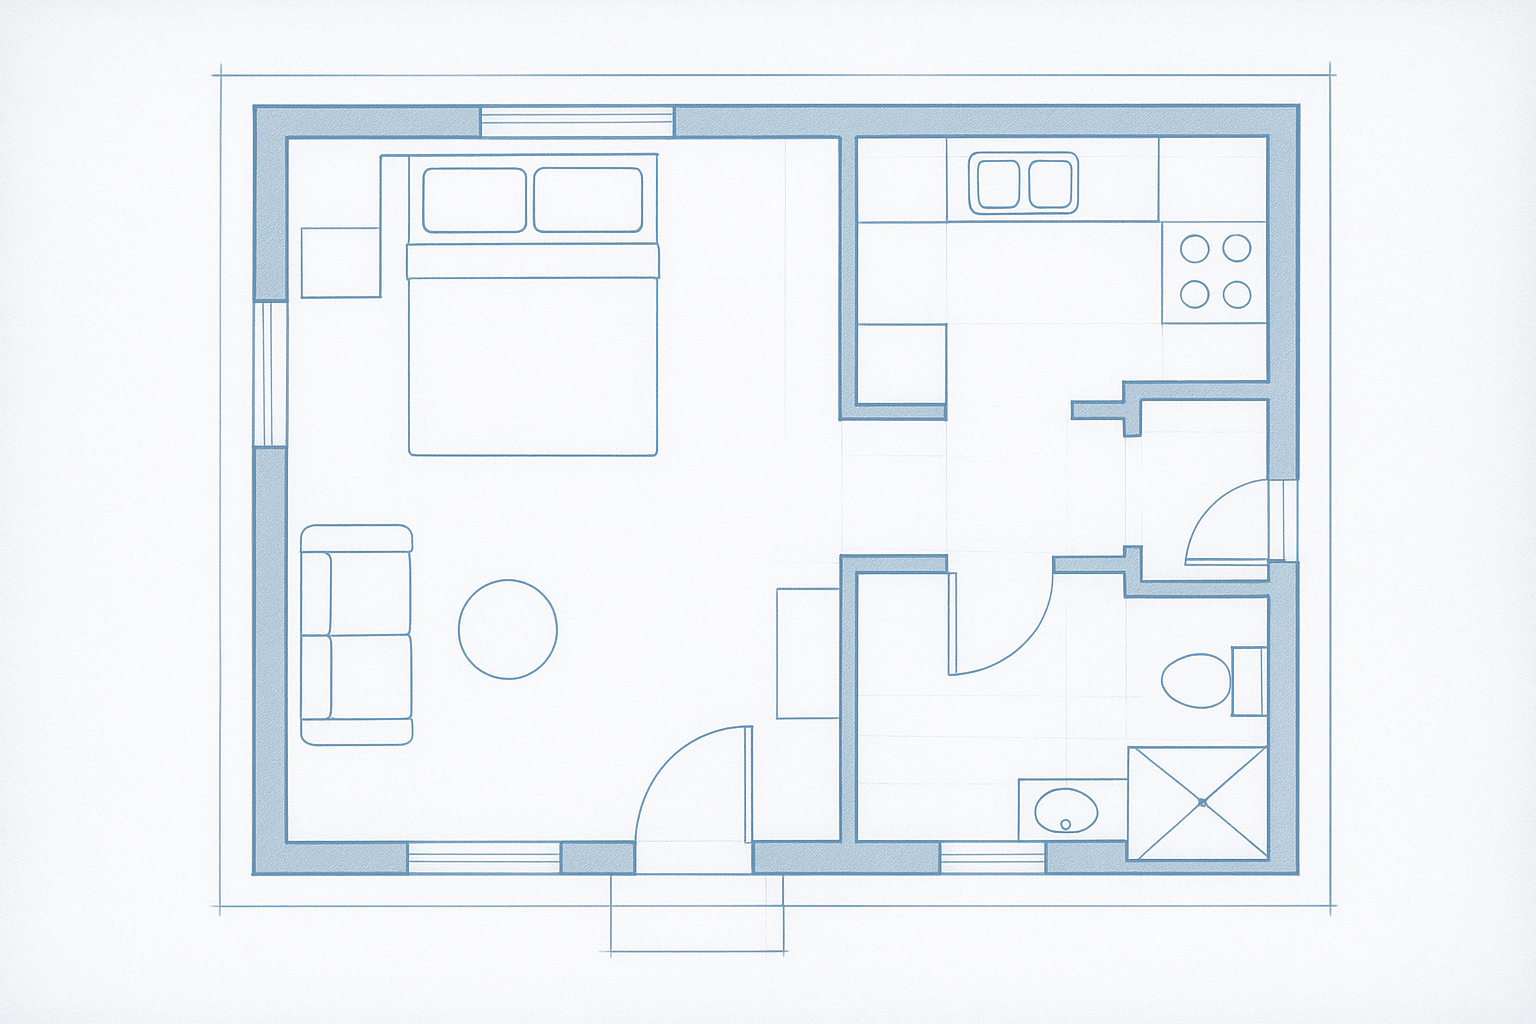
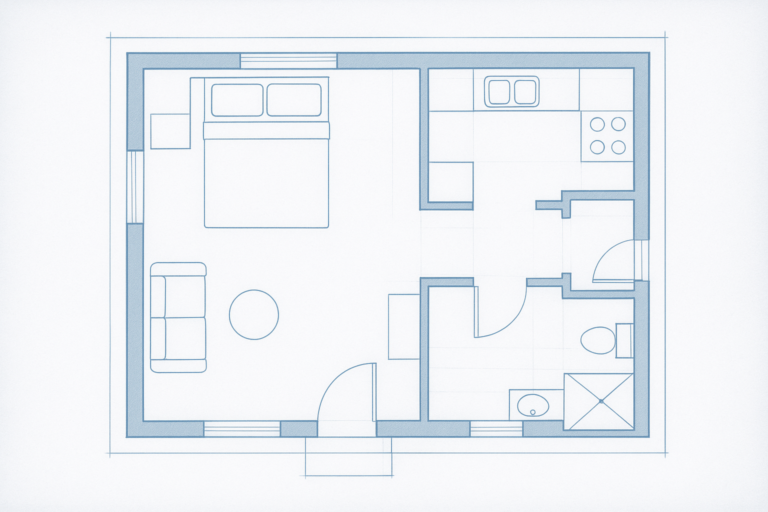
A detached studio ADU floor plan showing an efficient open layout with a kitchen, bathroom, and combined living and sleeping area — one of the most buildable configurations for small lots.
ADU Floor Plan Sizes: Studio, 1-Bedroom, 2-Bedroom Compared
Size is the most fundamental variable in any accessory dwelling unit floor plan. Your local zoning code will set the upper limit, but your budget, lot dimensions, and intended use determine where you should actually land within that range.
Studio ADU Floor Plans (300–500 sq ft)
Studio ADU floor plans are the most compact option, combining the living, sleeping, and kitchen areas into a single open space. They are ideal for small lots, low budgets, and rental situations where maximum yield per construction dollar is the priority. Because every square foot must serve multiple purposes, studio floor plans demand exceptionally intelligent spatial planning — think murphy beds, kitchen islands that double as dining surfaces, and built-in cabinetry that replaces the need for freestanding furniture. Studios typically carry the lowest absolute construction cost, ranging from $90,000 to $200,000 depending on region and finishes. See 500 Square Feet ADU for a practical 500 sq ft example and cost breakdown.
One-Bedroom ADU Floor Plans (450–750 sq ft)
One-bedroom ADU floor plans are the most popular size category for rental-focused homeowners. The defined bedroom provides meaningful privacy for tenants while the overall footprint remains manageable in terms of both cost and lot coverage. In most markets, one-bedroom ADUs command the highest rent-to-construction-cost ratio of any floor plan size — a critical metric if return on investment is your primary goal. Plans in this range typically include a full kitchen, a living area, a separate bedroom, and one full bathroom. Some include an additional half bath or laundry closet.
Two-Bedroom ADU Floor Plans (650–1,200 sq ft)
Two-bedroom ADU floor plans accommodate families, multigenerational households, and higher-income rental markets. They typically include two bedrooms, one or two bathrooms, a full kitchen, a living area, and — in well-designed plans — dedicated laundry space and a linen or storage closet. While they carry higher absolute construction costs (often $200,000–$450,000+), two-bedroom ADUs generate substantially higher rental income and significantly increase overall property value. Not all jurisdictions allow units up to 1,200 square feet, so confirm your local maximum before falling in love with a large plan.
- Studio: 300–500 sq ft | Open layout | Best for: small lots, single occupants, budget builds
- 1-Bedroom: 450–750 sq ft | Defined bedroom | Best for: rentals, highest ROI per sq ft
- 2-Bedroom: 650–1,200 sq ft | Full living unit | Best for: families, multigenerational, premium rentals
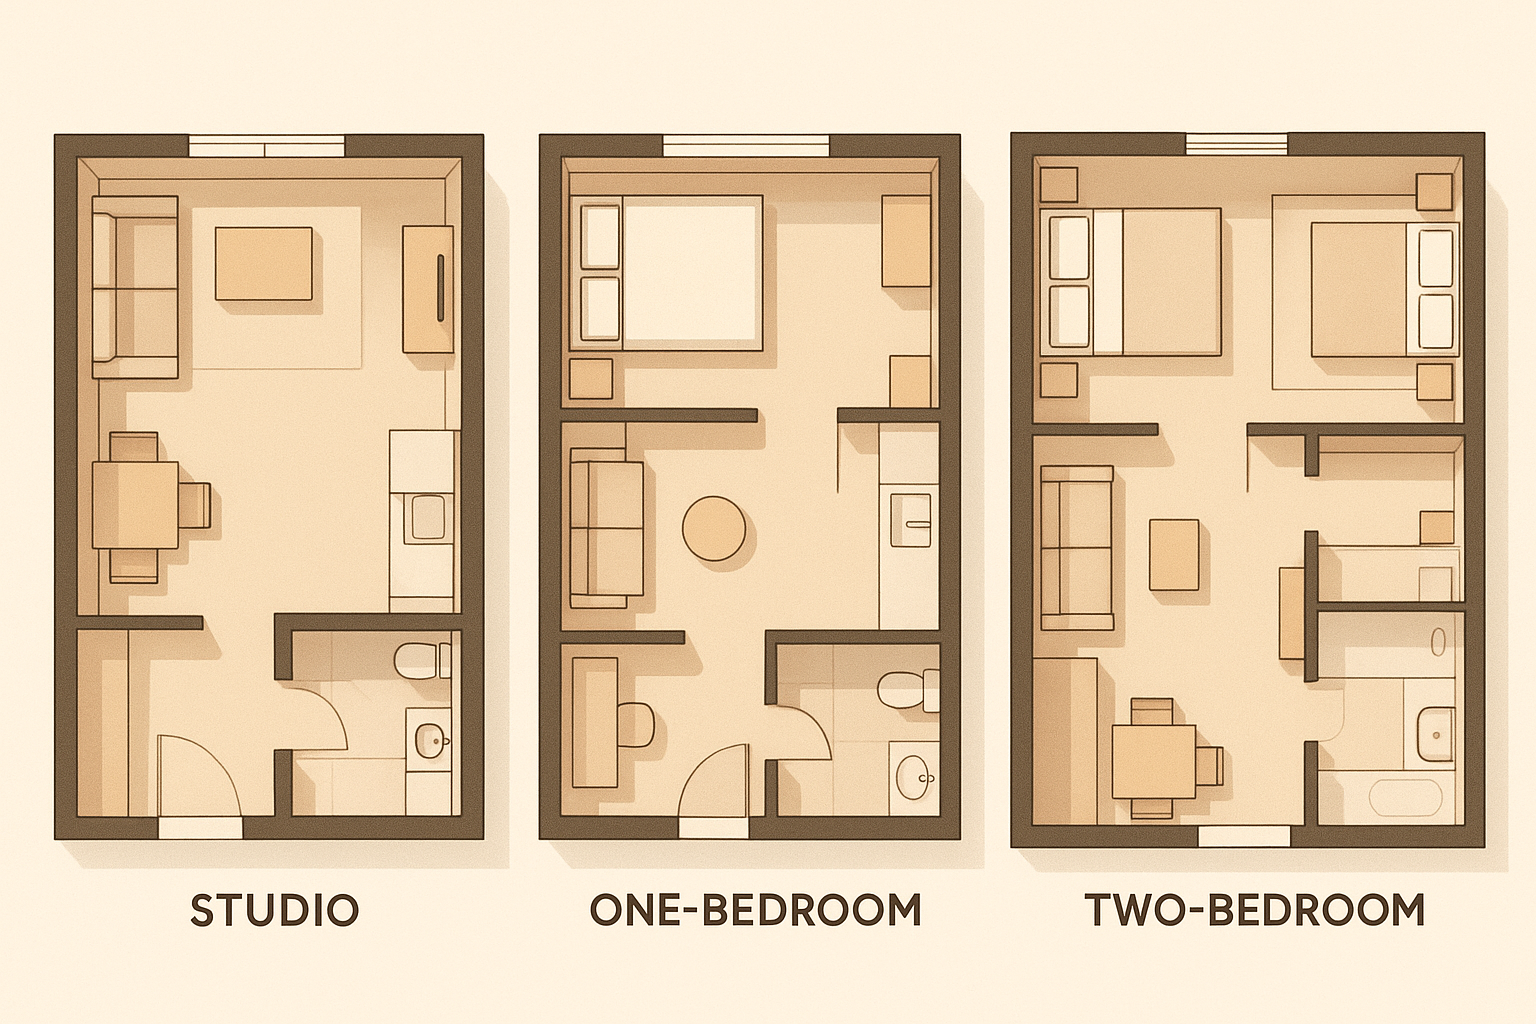
Side-by-side comparison of studio, one-bedroom, and two-bedroom ADU floor plan layouts helps homeowners match design to rental goals and lot constraints.
Popular ADU Floor Plan Styles and Configurations
Beyond the four main ADU types and bedroom counts, floor plans also vary significantly in their architectural style and configuration. Understanding these configurations helps you match the right plan to your lot, your neighborhood’s aesthetic character, and your long-term goals. Explore ADU designs for style examples, plans, and inspiration.
Single-Story (One-Level) ADU Plans
Single-story ADU floor plans spread the entire living space across one level. They are the most accessible configuration for aging-in-place and mobility-limited occupants. They also simplify construction — no staircase required, no complex multi-story structural engineering, and straightforward utility routing. The trade-off is lot coverage: a single-story plan requires more ground footprint to achieve larger square footage.
Two-Story ADU Floor Plans
Two-story ADU floor plans stack living space vertically, allowing a larger total square footage within a smaller ground footprint. This is particularly valuable on lots where lot coverage limits or setback requirements restrict horizontal expansion. A common two-story configuration places an open kitchen and living area on the ground floor with one or two bedrooms and a bathroom above. Height restrictions (often 16–25 feet for ADUs, depending on jurisdiction) must be verified before selecting a two-story plan.
Above-Garage ADU Plans
Above-garage ADU floor plans situate the dwelling unit on the second floor directly over an existing or new garage. This configuration is extremely popular in urban and suburban markets because it uses vertical space without eliminating parking or yard area. The structural requirements for above-garage ADUs are more complex than slab-on-grade builds — the floor plan must be coordinated with an engineer to ensure the existing garage structure can support the added load.
Basement ADU Floor Plans
Basement ADU floor plans convert below-grade space into a habitable dwelling. These are particularly common in older northeastern and midwestern cities where full basements are standard. Key design challenges include achieving minimum ceiling height (typically 7 feet for habitable space), providing code-compliant egress windows in sleeping areas, managing moisture and waterproofing, and creating adequate natural light through window wells or below-grade light courts. A well-designed basement ADU floor plan addresses all of these constraints explicitly rather than leaving them for the contractor to solve.
Backyard Cottage / Laneway House Plans
Backyard cottage and laneway house ADU floor plans are among the most popular detached configurations. They are positioned at the rear of the lot, often accessible via a rear alley or side path rather than the main street. These plans prioritize separation from the primary house, privacy for both households, and efficient use of rear yard space. Popular configurations include L-shaped cottages that frame an outdoor patio, compact rectangular footprints with a covered porch, and shed-roof designs that maximize interior headroom without triggering height restrictions.
How to Choose the Right ADU Floor Plan for Your Property
Selecting the right accessory dwelling unit floor plan is a multi-step process that requires balancing your local zoning rules, your lot’s physical constraints, your budget, and your intended use. Work through each step in sequence — skipping ahead leads to costly redesigns.
-
Step 1: Research Your Local Zoning Regulations
Look up your city or county’s ADU ordinance. Key parameters to note include: maximum ADU square footage, height limits, setback requirements from all property lines, lot coverage maximums, owner-occupancy requirements, and any design standards (roof pitch, exterior materials, window placement). Many California cities have streamlined ADU approval significantly under AB 68 and AB 2221, but rules vary dramatically from jurisdiction to jurisdiction — even within the same county.
-
Step 2: Conduct a Thorough Lot Assessment
Measure all available buildable area on your lot, accounting for required setbacks from all four property lines. Identify the location of existing utility lines, sewer laterals, and easements — utility conflicts are one of the most common sources of budget overruns in ADU construction. Note topographic changes, drainage patterns, and tree canopy coverage. A lot that appears spacious on a map can have surprisingly limited buildable area once all constraints are mapped.
-
Step 3: Define the Primary Purpose of Your ADU
Different uses demand different floor plan priorities. A long-term rental unit needs a private entrance, a full kitchen, in-unit laundry, and defined bedroom separation. A multigenerational suite for aging parents benefits from a single-level plan, wider doorways (minimum 32–36 inches), roll-in shower accessibility, and proximity to the main house. A short-term rental or home office conversion may prioritize open layouts and high-end finishes over storage and laundry. Define your use case first, and then filter floor plans against it.
-
Step 4: Set a Realistic Budget Range
Your budget directly determines which floor plans are realistic options. As a general rule, detached ADU construction in most U.S. markets ranges from $150 to $400 per square foot. A 600-square-foot detached ADU in California, for example, can realistically cost $250,000–$350,000 all-in including design, permits, and construction. Garage conversions and attached ADUs typically run lower. Pre-designed or pre-approved plan sets can reduce design and permit costs substantially, but confirm the plan is approvable in your jurisdiction before purchasing.
-
Step 5: Choose Between Custom, Pre-Designed, and Pre-Approved Plans
You have three main options. A custom design from a local architect gives you maximum control over every detail but typically costs $8,000–$25,000 in design fees and takes 3–6 months before permit submission. A pre-designed plan set from an ADU plan provider costs $500–$5,000 and can be customized by a local architect for your lot — saving significant design time. A pre-approved or pre-permitted plan from your city’s ADU plan library has already passed plan check review, compressing permit timelines from months to weeks. Resources like The ADU Pro can help you evaluate which path makes sense for your specific jurisdiction and goals.
- Step 6: Review and Finalize the Floor Plan with Your Build Team Before finalizing any floor plan, walk through it with your general contractor, plumber, and — if applicable — a structural engineer. The contractor identifies constructability issues specific to your lot. The plumber identifies the most cost-effective routing for supply and waste lines relative to the main sewer connection. The structural engineer ensures the plan works with your specific soil and foundation conditions. Changes made at the plan stage cost nothing; changes made during construction are expensive. Consider permit-ready ADU plans when timeline certainty is a priority.
Key Design Elements Every Great ADU Floor Plan Must Include
Regardless of size, type, or configuration, every high-performing accessory dwelling unit floor plan shares a core set of design features. These are not optional niceties — they determine whether your ADU will rent well, pass inspection, and remain comfortable over the long term.
Private, Dedicated Entrance
A separate, clearly defined entrance is required by code in virtually every jurisdiction to legally classify the unit as an independent dwelling. Beyond code, a private entrance that does not require passing through the main home’s interior is essential for real-world livability and rental attractiveness. Ideally, the ADU entrance should face a different direction than the primary home’s front door and have its own covered entry or porch for weather protection.
Full Kitchen or Efficient Kitchenette
A full ADU requires a permanent kitchen with a full-size range or cooktop, refrigerator, sink, and code-compliant ventilation. A JADU may use an efficiency kitchen with a two-burner cooktop and compact sink. The kitchen placement within the floor plan directly affects plumbing cost — locating it on a shared wall with the bathroom consolidates waste and supply lines, reducing both construction cost and the likelihood of future plumbing issues.
Full Bathroom with Adequate Clearances
Every ADU floor plan must include at least one full bathroom (toilet, sink, and shower or tub). Building codes require specific clearances around fixtures — typically 15 to 18 inches from toilet centerline to side wall, 21 to 24 inches clear in front of the toilet, and minimum 36-inch shower dimensions. Plans that cut corners on bathroom sizing frequently fail plan check or require expensive field modifications. For aging-in-place applications, a roll-in shower (minimum 36 x 36 inches, ideally 36 x 60 inches) with a fold-down bench adds enormous long-term value.
Adequate Natural Light and Ventilation
California and most other states require habitable rooms to have glazing (windows or skylights) equal to at least 8% of the room’s floor area, with openable ventilation equal to at least 4%. Beyond code minimums, generous natural light is one of the most powerful factors in ADU rental performance. Compact ADUs that feel bright and airy rent faster and command higher rents. Egress windows (minimum 5.7 square feet of clear openable area, minimum 24 inches high, and minimum 20 inches wide) are non-negotiable in all sleeping areas and must be detailed in the floor plan.
Built-In Storage and Multi-Purpose Spaces
Storage is one of the most under-planned elements in ADU floor plans. In compact units, storage must be integrated directly into the architecture — built-in cabinetry under stairs, closets designed as structural walls, kitchen pantry columns, and bathroom vanity storage that doubles as partition walls. Floor plans that treat storage as a furniture problem rather than an architectural problem result in cramped, cluttered units that tenants dislike and that feel smaller than they actually are.
Dedicated Mechanical Space
Every ADU floor plan needs dedicated, code-compliant space for mechanical systems: HVAC equipment (mini-split systems are most common in ADUs due to their flexibility and efficiency), tankless or tank-style water heater, electrical panel, and — in increasingly common all-electric builds — an EV charger rough-in. Mechanical closets that are too small for their equipment are a frequent plan check failure point. Plan for at least 20–30 square feet of dedicated mechanical space in any ADU over 400 square feet.
In-Unit Laundry Provisions
In-unit laundry — even just a stacked washer/dryer closet — dramatically increases the rental appeal and market value of any ADU. Plan for a 24-inch-deep, 30-inch-wide laundry alcove with 240V electrical, hot/cold water supply, and drain access. This is far less expensive to rough in during original construction than to add later.
ADU Floor Plan Design for Specific Use Cases
The best accessory dwelling unit floor plan for your project depends heavily on how the unit will be used. Here is how design priorities shift based on intended use.
ADU Floor Plans for Long-Term Rental Income
For rental-focused ADUs, prioritize one-bedroom layouts (the highest-demand rental unit size in most markets), in-unit laundry, full kitchen, and durable, low-maintenance finishes. Include at least one dedicated parking space in your site plan if local codes require it. Maximize ceiling height where possible — 9-foot ceilings make a compact space feel significantly more expansive. Avoid layouts that create awkward furniture arrangements or sacrifice bedroom size for oversized living areas.
ADU Floor Plans for Multigenerational Living
Multigenerational ADU floor plans for aging parents or adult children should prioritize single-level layouts, wide doorways (minimum 32 inches, ideally 36 inches), barrier-free thresholds, a roll-in accessible shower, and proximity to the main house without sacrificing privacy. Consider a covered walkway or breezeway connecting the ADU to the main home for weather protection and convenience. Locate the ADU so that line-of-sight between the two units is possible without sacrificing acoustic privacy.
ADU Floor Plans for Short-Term or Vacation Rental
Short-term rental ADU floor plans prioritize visual appeal, open-concept living spaces, high-end kitchen finishes, and memorable design details that photograph well. A covered outdoor deck or patio directly accessible from the living area is a significant short-term rental amenity. Check your city’s STR regulations carefully — many jurisdictions now restrict short-term rentals to owner-occupied properties, which affects which ADU type makes the most sense for your situation.
ADU Floor Plans as Home Office or Studio Space
Work-from-home professionals and artists increasingly use ADUs as dedicated office or studio spaces. These floor plans can prioritize large glazing for natural light, high ceilings, open floor areas without load-bearing interior walls, robust electrical service for equipment, and sound insulation from the main home. Even a 300-square-foot studio ADU can serve as a highly productive, distraction-free workspace that also adds significant resale value.
Custom vs. Pre-Designed vs. Pre-Approved ADU Floor Plans
Understanding the three main paths to obtaining an accessory dwelling unit floor plan helps you make an informed decision about where to invest your design budget. Explore our ultimate ADU design guide for design and construction workflows.
Custom ADU Floor Plans
Custom designs are created from scratch by a licensed architect or ADU design firm specifically for your lot and goals. They offer the highest level of precision and personalization but come with the highest design cost and longest timeline.
- Cost: $8,000–$25,000+ in design fees
- Timeline to permit submission: 3–6 months
- Best for: Unusual lot shapes, complex hillside sites, design-forward projects, or situations where no pre-designed plan fits the constraints
Pre-Designed ADU Plan Sets
Pre-designed plans are professionally drawn floor plans available for purchase, typically requiring a licensed local architect to stamp them for your specific jurisdiction and adapt them to your lot conditions.
- Cost: $500–$5,000 for the plan set; additional $2,000–$8,000 for local architect stamping and adaptations
- Timeline to permit submission: 4–10 weeks
- Best for: Standard rectangular lots in jurisdictions with predictable ADU review processes
Pre-Approved (Pre-Permitted) ADU Plans
Pre-approved ADU plan libraries are offered by a growing number of California cities (Los Angeles, San Jose, San Diego, Sacramento) and some jurisdictions in other states. These plans have already passed plan check review and are available for homeowners to use directly — often for free or at minimal cost — with dramatically compressed permit timelines.
- Cost: Free to $1,500 for the plan; site-specific adaptations may add cost
- Timeline to permit submission: 1–4 weeks
- Best for: Standard lot conditions in participating cities where speed-to-permit is the top priority
- Limitation: Plan selection is limited to what the city offers; may not accommodate all lot configurations or aesthetic preferences
Common Mistakes to Avoid When Selecting ADU Floor Plans
The most expensive ADU mistakes are almost always made at the floor plan selection stage — not during construction. Avoid these common pitfalls.
Selecting a Plan Before Verifying Zoning Compliance
Falling in love with a two-story design only to discover that your jurisdiction caps ADU height at 16 feet is an avoidable and costly mistake. Always confirm your local ADU ordinance specifics — maximum square footage, height limit, setbacks, and any design standards — before investing time or money in a specific plan.
Underestimating Utility Connection Costs
Where you place the bathroom and kitchen on the floor plan relative to the main sewer connection has a direct and sometimes dramatic effect on your budget. Sewer lateral extensions across a large lot can cost $15,000–$40,000 or more in areas with difficult soil or old clay pipe infrastructure. Always review your floor plan with a licensed plumber before finalizing the layout — a simple 10-foot shift in bathroom placement can save thousands.
Ignoring Parking Requirements
While California has eliminated most ADU parking requirements, many other states still require one off-street parking space per ADU bedroom. A floor plan that consumes all available paved area without accounting for parking may fail plan check. Verify parking requirements in your jurisdiction before selecting a floor plan footprint.
Overlooking Ceiling Height Requirements
Building codes require a minimum finished ceiling height of 7 feet in habitable rooms. Garage conversions and basement ADUs are particularly vulnerable to this issue. A floor plan that does not explicitly address how minimum ceiling height will be achieved in an existing structure with a low slab-to-rafter dimension will fail inspection.
Planning for Too Little Storage
Compact ADUs that lack adequate integrated storage feel significantly smaller and less livable than their square footage suggests. This is one of the most consistent complaints in ADU tenant feedback. Ensure your floor plan explicitly designates storage — bedroom closets, kitchen pantry, bathroom linen space, and exterior storage if the unit lacks interior space.
ADU Floor Plans and the Permitting Process
Even the most beautifully designed accessory dwelling unit floor plan is useless until it clears the permit process. Understanding what building departments require — and how to give it to them the first time — saves months of delays. Reference the ADU permit guide for document checklists, timelines, and city-specific tips.
What a Complete ADU Plan Set Includes
Most building departments require the following documents as part of a complete ADU plan set:
- Site Plan: Shows the proposed ADU’s location on the lot relative to property lines, the primary structure, and setbacks — drawn to scale
- Floor Plan: Dimensioned interior layout showing all rooms, walls, doors, windows, and fixture locations
- Exterior Elevations: All four sides of the building showing finished heights, fenestration, and exterior materials
- Building Sections: Cross-sections showing wall assemblies, floor-to-ceiling heights, insulation, and structural members
- Structural Drawings: Foundation plan, framing plan, and connection details stamped by a licensed structural engineer
- Electrical, Plumbing, and Mechanical Plans: Required by most jurisdictions, showing panel size, circuit layout, fixture locations, and HVAC design
- Energy Compliance Report: Title 24 in California; IECC compliance documentation in other states
Pre-Approved ADU Plan Programs: Cities Leading the Way
California has been the most aggressive state in streamlining ADU plan approval. A growing number of cities now offer pre-approved ADU floor plan libraries that dramatically reduce permit timelines. Notable programs include:
- Los Angeles: Standard Plan Program offering pre-approved ADU plans in multiple sizes and configurations
- San Jose: Pre-approved ADU plan library available for free download and permit submission
- Sacramento: Pre-approved ADU plans through the city’s planning department website
- San Diego: Standard Plan Program with multiple pre-approved ADU configurations
Using a pre-approved plan can compress permit approval from the typical 2–6 month window down to as little as 1–4 weeks. For guidance on whether a pre-approved plan is the right path for your property, The ADU Pro offers personalized consulting to help homeowners identify the fastest and most cost-effective route from plan to permit.
ADU Floor Plans and Property Value: What the Data Shows
The right accessory dwelling unit floor plan does more than create a functional living space — it adds measurable value to your property. Here is what homeowners and appraisers consistently observe:
- Property value increase: A permitted, well-designed ADU typically increases property value by $100,000–$300,000+ depending on market and ADU size. In high-cost metros like Los Angeles, the Bay Area, and Seattle, the increase can be even greater.
- Rental income potential: ADU rental rates in California markets range from $1,200/month (studio in smaller markets) to $3,500+/month (two-bedroom in urban coastal markets). Even modest rental income substantially offsets the construction cost within 5–10 years.
- Appraisal impact: ADUs are increasingly being appraised using an income approach in addition to the comparable sales approach, meaning a well-designed, rentable ADU floor plan with strong rental income history receives the highest appraisal premium.
- Marketability: Properties with permitted ADUs sell faster and to a broader buyer pool — including investors and multigenerational families — compared to equivalent properties without ADUs.
Conclusion: Choosing the Best Accessory Dwelling Unit Floor Plans
Choosing the right accessory dwelling unit floor plans requires methodically balancing your property’s physical constraints, your local zoning code, your construction budget, and your intended use — whether that is rental income, multigenerational living, or long-term property investment. There is no universally “best” ADU floor plan; there is only the best plan for your specific lot, goals, and budget.
The floor plan you select will shape every decision that follows — from contractor bids to permit timelines to long-term rental performance. It determines how much your ADU costs to build, how comfortable it is to live in, how quickly it rents, and how much value it adds to your property over time. That is why understanding the types, sizes, configurations, design elements, and pitfalls covered in this guide is so critical before you commit to any specific layout.
For personalized guidance on selecting, customizing, and permitting the right ADU floor plan for your property, The ADU Pro offers expert consulting that helps homeowners navigate every stage of the process efficiently and confidently. Last updated: 2026-06-11. Add an author byline and short bio with credentials, and display a visible publication/last-updated date to strengthen E-E-A-T.
Frequently Asked Questions About Accessory Dwelling Unit Floor Plans
What are accessory dwelling unit floor plans?
Accessory dwelling unit floor plans are scaled architectural drawings that document the interior layout of a secondary housing unit on the same lot as a primary residence. They show room arrangements, wall positions, doors, windows, utility placements, and mechanical spaces, and are used by architects, contractors, and permit offices to plan and approve ADU construction.
What is the minimum square footage for an ADU floor plan?
Most jurisdictions require a minimum of 150 to 220 square feet for an ADU to qualify as a habitable unit. Junior ADUs (JADUs) are typically limited to a maximum of 500 square feet. Always verify the exact minimum and maximum with your city or county planning department before finalizing any floor plan.
What is the most popular ADU floor plan size?
The most popular accessory dwelling unit floor plan sizes range from 400 to 800 square feet, accommodating studio or one-bedroom layouts. One-bedroom ADUs in the 500–700 square foot range are the most requested size for rental-focused projects because they offer the best balance of construction cost, livability, and rental income potential.
Can I build a two-bedroom ADU?
Yes. Many jurisdictions allow two-bedroom ADUs ranging from 650 to 1,200 square feet. Two-bedroom ADU floor plans are ideal for families, higher-income rental markets, and properties where maximum rental income or multigenerational accommodation is the goal. Confirm your local maximum square footage limit with your planning department before designing a two-bedroom layout.
What is the difference between a detached and attached ADU floor plan?
A detached ADU floor plan describes a fully independent structure on the same lot as the main home, sharing no walls with the primary residence. An attached ADU floor plan shares at least one wall with the primary home. Detached plans offer greater privacy and design flexibility; attached plans are typically more cost-effective to construct because they share structural elements and can more easily connect to existing utilities.
What is a junior ADU floor plan?
A junior ADU (JADU) floor plan is a layout contained entirely within the existing footprint of the primary home, typically under 500 square feet. It must include a private entrance and a dedicated cooking area but may share a bathroom with the main house. JADUs are the most affordable ADU option and are governed by specific state and local regulations regarding owner occupancy.
How does a garage conversion ADU floor plan work?
A garage conversion ADU floor plan repurposes an existing garage structure into a fully livable dwelling unit within the original footprint. The design must address ceiling height requirements (minimum 7 feet for habitable space), insulation upgrades, plumbing, egress windows in sleeping areas, HVAC, and utility connections — all within the fixed dimensions of the existing garage slab and structure.
Do I need an architect to create ADU floor plans?
In most jurisdictions, yes. Most municipalities require stamped drawings from a licensed architect or structural engineer for permit approval. However, pre-approved ADU plan programs offered by many California cities allow homeowners to use pre-reviewed layouts without hiring an architect for the design phase — though a local professional may still need to adapt the plan to your specific lot conditions.
How long does it take to get ADU floor plans approved?
Permit approval timelines vary widely by jurisdiction, typically ranging from 4 weeks to 6 months for custom ADU plans. Cities with pre-approved ADU floor plan programs can reduce approval time to as little as 1 to 4 weeks. California’s ADU streamlining legislation (AB 2221 and related bills) has significantly compressed timelines for compliant plans in many jurisdictions.
What features should a good ADU floor plan include?
A well-designed accessory dwelling unit floor plan should include a private entrance, a full kitchen or kitchenette, a full bathroom with code-compliant clearances, adequate natural light and egress windows in sleeping areas, dedicated mechanical space for HVAC and water heater, integrated storage, and provisions for in-unit laundry. Accessibility features such as wider doorways and barrier-free shower access are also highly valuable for long-term use.
Can ADU floor plans be customized after purchase?
Yes. Pre-drawn accessory dwelling unit floor plans can typically be modified by a licensed architect or designer to suit your specific lot dimensions, orientation, utility layout, and personal preferences. Modifications to a pre-approved city plan may require an additional plan review cycle, but modifications to purchased pre-designed plan sets can usually be adapted by a local architect and submitted as a standard custom permit application.
What is the average cost to design ADU floor plans?
Professional custom ADU floor plan design typically costs between $8,000 and $25,000 depending on size, complexity, and the architect or firm. Pre-designed plan sets can cost $500–$5,000, with additional fees for local stamping and adaptation. Pre-approved city plans are often free or available for a minimal administrative fee, making them the most cost-effective starting point for eligible properties.
Are there free ADU floor plan resources available?
Yes. Many California cities — including Los Angeles, San Jose, Sacramento, and San Diego — offer free pre-approved ADU floor plan libraries through their planning department websites. These programs allow homeowners to download and use pre-reviewed plans at no design cost, with significantly reduced permit processing times. Online ADU resources and consulting services like The ADU Pro also provide plan guidance and examples to help homeowners evaluate their options.
What is an above-garage ADU floor plan?
An above-garage ADU floor plan positions the dwelling unit on the second floor directly over an existing or new garage. This configuration is popular in urban markets because it maximizes usable space without eliminating ground-level parking or yard area. The floor plan must be coordinated with a structural engineer to ensure the existing or new garage structure can support the additional load of the habitable floor above.